CONTENTS
1.Introduction to TestProject
2.History of TestProject
3.Features of TestProject
4.What’s unique in TestProject?
5.Getting started with TestProject
6.Web UI Testing using TestProject
7.Overview of new TestProject SDK
8.Conclusion
Let's get started with TestProject....!!!!!!!!
1. Introduction to TestProject
First let us learn “What is TestProject?”
Let's get started with TestProject....!!!!!!!!
1. Introduction to TestProject
First let us learn “What is TestProject?”
TestProject is an open source end to end
test automation platform for web, mobile & API testing that supports by the
#1 test automation community.
It supports Windows, MAC and Linux Operating
Systems.
It supports Web, Android, IOS and Webservices
platforms.
In simple sentence I can say that “It is a
codeless automation tool with record & playback feature and allows to schedule
jobs as well.”
2. History of TestProject
TestProject was developed in 2015.The first
public version was launched in April,2018.
They have a super cool website with very
easily understandable documentation and online chat all time.
You can find all the details in their website TestProject
3. Features of TestProject
Let us see all the features of TestProject
listed in the below flow diagram.

4. What’s unique in TestProject?
The below diagram clears us what is unique
in TestProject.

I know by seeing all the
cool existing features, you will be eager to get started with TestProject. It
can all be done in just few simple steps:
Create a TestProject account and go through
the below links:
2. Installation and Setup
6. Web UI Testing
using TestProject
Step:1:
Creating a Project
Once you login to TestProject, the below web page will be displayed.
Click on “Add a New Project” button.

Step:2: Give the Project details as shown in below web page

Step:3: Project will be created and click on the Project, you will be displayed with below web page.


Step:4: Click on ‘Create a Test’ and add a new test. You can actually add a test using three ways highlighted below.

Step:5: Select whether it is web , mobile or code.

Step:6: Add Test Details.

Step:7: Select the web application and add the details.


Step:8: Start Testing and you will be redirected to web page and you can add the steps so that it will record.

Step:9: You can add validations, you can download the manual test case which is well organized.

Step: 10 : Creating a job can be done with two ways as shown below :

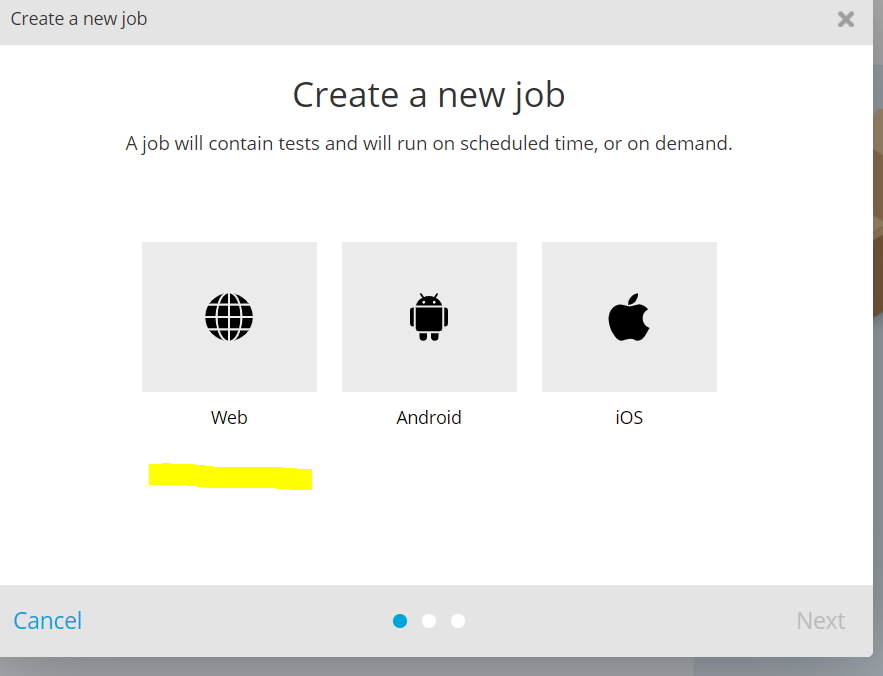
Step:11: Select whether it is Web, Android or IOS and click on ‘Next’ button.
Step: 12: Give the Job details.

Step:13: Select the agent browser.

Step:14: Once the job is created we need to add the Test to the job by drag and drop as shown below. (Drag and Drop from left to right)

Step:15: Once the tests are added to Job ,we can schedule or run.

Step:16: Click on ‘Run’ option and reports will be generated under ‘Reports’ tab.
Click on Reports tab and you will displayed with detailed report
as shown below.

These are the simple steps to get started with TestProject for Web UI Testing.
TestProject has many more features to explore and excited to
use as well. It is a very good platform to learn, explore and share. We can
even get Java code by running the automation test.
7.Overview of new TestProject SDK
TestProject
has announced new SDK on July 14th,2020 with lots of additional cool
features.
The main highlight is “It supports a powerful language “Python”
and lot more additional features.
Let us have a look at
them.

8.Conclusion
Even I have excited to learn more about this new SDK in
detail. I hope the above flow diagram gives an overview of new TestProject SDK
at a high-level.
Hope my blog helps to get you started with Web UI Testing
with simple test and get to know about the cool features of new SDK as well.
Thanks for reading my longest Blog...!!!!
No comments:
Post a Comment